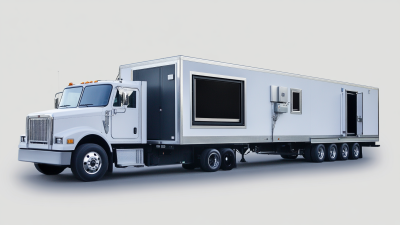
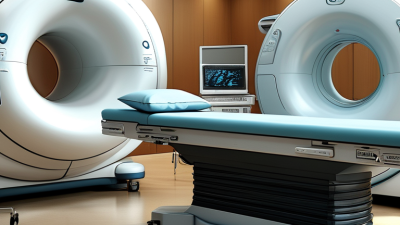
Renting a CT scanner can help a healthcare facility manage rising demand, cover a temporary service gap, or evaluate new imaging capacity. But the right choice depends on more than the monthly price. Before you Rent Ct Scanner, define the examinations you expect to perform, the number of patients you serve, and the image quality your clinicians need. Small details matter. A busy emergency department may need a different configuration from an outpatient imaging center.
A practical rental plan also checks whether the scanner fits the site. Confirm room dimensions, electrical capacity, cooling, access for delivery, and shielding requirements with qualified professionals. Ask what the agreement includes: installation, staff training, software, maintenance, replacement support, and removal at the end of the term. Response times matter when a scanner is unavailable. So do fees that appear outside the headline rate. Get the details in writing.
These seven tips will help you compare equipment and rental terms with clearer expectations. They are not a substitute for advice from your clinical, technical, and financial teams. Even a thorough checklist can miss a local constraint. That is worth admitting early. Review the proposed setup with the people who will operate and maintain the scanner, and confirm that the arrangement suits your facility’s workflow. With careful questions, you can reduce avoidable delays and choose a rental that supports dependable patient care.

Before renting a CT scanner, define the clinical work it must support. Review recent scan volumes, referral patterns, and the examinations your team cannot accommodate with existing equipment. A temporary unit for routine outpatient imaging may need different capabilities from one supporting emergency or inpatient care. Check required scan protocols with your radiologist and imaging staff. Measure twice. Confirm room dimensions, doorway clearance, floor loading, electrical capacity, cooling, and access for delivery. A scanner that fits on paper may still be difficult to install in a busy department.
Estimate the rental period from the full project timeline, not just the planned start date. Include delivery, installation, acceptance testing, staff training, and any delay before the first patient is scanned. Then estimate the expected end date, allowing time for removal or a transition to permanent equipment. For construction projects, ask the site manager about likely schedule changes. A few weeks can become months. That matters. Compare the cost of a longer rental with extension terms and possible downtime, rather than choosing the shortest quote by default.
Match the rental duration to realistic patient volume and staffing. If technologists are available only on certain shifts, a round-the-clock service plan may not be useful. Confirm who handles maintenance, response times, and replacement arrangements if the unit is unavailable. Keep a written list of assumptions, including daily scan volume and installation dates. These estimates will not be perfect; mine rarely are. Review them with clinical, facilities, and finance leads before committing.
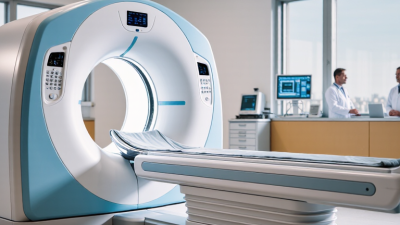
A rental quote is only useful when the scanner fits your exam mix. Compare detector configuration, slice capability, rotation time, and available reconstruction tools. Then check tube capacity and whether the system supports your busiest protocols. A high slice count alone does not guarantee faster patient flow. Measure the room, confirm power and cooling requirements, and plan delivery access before signing. Small details matter.
Dose performance deserves a close look. RadiologyInfo, maintained by the American College of Radiology and Radiological Society of North America, gives typical adult effective-dose estimates of about 6.1 mSv for chest CT and 7.7 mSv for abdomen-pelvis CT. Actual dose varies by protocol and patient. Ask for exam-specific dose data, and compare it with relevant American College of Radiology Dose Index Registry benchmarks. For costs, request a written breakdown covering delivery, installation, training, service, software, and removal. Check what happens when a scan is delayed by equipment downtime. The monthly rate may not tell the whole story.
Read contract terms line by line. Confirm the rental period, minimum commitment, service response window, replacement-equipment policy, and charges for early termination. Ask who pays for site modifications and after-hours support. A spreadsheet can still mislead. I would also verify that quoted service coverage matches your actual operating hours; this detail is easy to overlook, and not every facility has the same needs.
7 Tips for Renting a CT Scanner
Renting a CT scanner is not just a matter of comparing prices. Verify that the unit meets applicable safety requirements, and request current inspection and maintenance records. Ask who performed the checks and when. Keep copies. A tidy room and polished exterior are reassuring, but they do not prove that the scanner is functioning properly.
Ask for documented image-quality and operational testing before accepting the equipment. Check the scan table’s movement, emergency stop, and the condition of cables and patient supports. Review service coverage in writing: response hours, escalation contacts, parts availability, and who pays for repair-related downtime. A delayed technician can disrupt a full day of appointments. Clarify how urgent problems will be handled, including outside normal business hours. Confirm that installation, testing, and staff orientation are included, with qualified personnel assigned to each task.
Equipment condition deserves a close look. Request service history and relevant usage information, then have your technical team assess the scanner on site. Watch for unusual noise, inconsistent table movement, or image artifacts during testing. I’d be wary of relying on a brief demonstration alone; it can miss problems that appear under routine workload. A written acceptance checklist helps, even if it feels a little fussy.
Verify safety standards, service coverage, and equipment condition before signing a rental agreement.
Each bar represents one practical verification item, not a score or statistical measurement. Confirm applicable radiation-safety requirements and equipment checks with qualified professionals and local regulators.
7 Tips for Renting a CT Scanner
A rental works best when delivery planning starts before the scanner leaves its storage site. Measure doorways, corridors, elevator capacity, and floor loading; a few centimeters can change the rigging plan. Confirm the room’s power, cooling, network connections, and shielding requirements with qualified site and imaging professionals. Test the route. Leave space for service access, not just the scanner. NCRP Report No. 160 estimated that CT accounted for 24% of medical imaging procedures but 49% of collective medical imaging dose in the United States in 2006. Though historical, this is a useful reminder: installation checks and consistent protocols matter.
Tips: Assign one site lead to coordinate delivery, installation, and clinical readiness. Schedule acceptance testing and image-quality checks before patient bookings begin. Train technologists on the scanner’s actual controls, dose indicators, and local protocols—not only on a generic checklist. Include a supervised practice session using typical cases. Small details matter. A rushed handoff can undo careful planning.
Map the patient journey before go-live: registration, screening, preparation, scanning, and room turnover. Confirm who handles schedule changes, equipment faults, and urgent escalation. Run a mock appointment and time each step; bottlenecks often appear at the doorway or preparation area. Review the first week’s workflow with staff and adjust it. The plan may still need work. That is useful feedback, not failure.
| Tip | Planning dimension | Recommended actions | Planning target or evidence |
|---|---|---|---|
| 1. Confirm the clinical need | Exam mix, patient volume, and rental duration | Estimate daily scan volume and identify required protocols, patient groups, and peak hours before selecting a rental configuration. | Prepare a written exam list and volume estimate covering a representative operating week. |
| 2. Survey the room and utilities | Room dimensions, power, cooling, and shielding | Have facilities staff and a qualified medical physicist review the proposed room, electrical supply, heat load, and radiation-shielding requirements. Confirm specifications for the selected system. | Document site readiness and obtain the required shielding review before installation work begins. |
| 3. Plan the delivery route | Access, clearances, and transport coordination | Measure doorways, corridors, elevators, and turns; check floor loading and identify any need for a lift, temporary opening, or traffic control. Confirm transport requirements with the equipment team. | Complete a documented route survey and agree on a delivery window with the site team. |
| 4. Coordinate installation and acceptance testing | Installation sequence, testing, and authorization | Schedule equipment setup, application configuration, and acceptance testing. Verify image quality, safety functions, and required documentation before scanning patients. | Keep signed acceptance and commissioning records; start clinical use only after applicable checks and approvals are complete. |
| 5. Train staff before go-live | Operators, clinicians, and coverage | Arrange system-specific training for technologists and relevant staff. Include patient positioning, protocol selection, dose optimization, emergency procedures, and routine quality checks. | Record training completion and confirm trained coverage for every planned operating shift. |
| 6. Test the imaging and IT workflow | Order entry, image transfer, and reporting | Test the full pathway from scheduling and patient identification to image transfer, interpretation, and report delivery. Confirm network access, user permissions, and downtime procedures. | Complete end-to-end test cases using appropriate test data before the first clinical appointment. |
| 7. Monitor operations and plan the exit | Throughput, service response, and return logistics | Track appointment delays, completed exams, downtime, and repeat scans. Agree on service contacts, maintenance responsibilities, rental-end notice, de-installation, and data handling. | Review a simple weekly operations log and confirm the return plan and responsibilities in writing. |
Planning details and technical requirements vary by scanner configuration, facility, and local regulations; confirm them with qualified site, clinical, and radiation-safety professionals.
Log every scan-room interruption, error code, and service visit during the rental. Compare image quality with the acceptance baseline, not yesterday’s best-looking scan. Check water phantom CT numbers, image noise, and visible artifacts on the schedule agreed with the imaging physicist. Small shifts matter. AAPM Report 233 recommends evaluating CT performance through image-quality measures such as noise, spatial resolution, and low-contrast detectability. Record results with dates and protocol details, so changes can be traced rather than guessed. Also track CTDIvol and dose-length product from routine exams. AAPM Report 204 explains how size-specific dose estimates adjust CTDIvol for patient size; CTDIvol alone is not an individual patient dose.
Before service, save the fault log and note when the issue occurs, such as during warm-up or a specific protocol. Share these details with the service team. They can help distinguish a recurring fault from a one-time interruption. Keep a simple record of downtime, tube-use indicators, and unresolved image-quality concerns. It may be incomplete. Improve it as you go. Before return, arrange a documented performance check, review open faults, and confirm that accessories and cables are accounted for. Compare final image and dose checks with the original acceptance results, using the same protocols where practical. Retain the reports and service notes with the rental file; avoid relying on verbal assurances alone.