How to Use a Portable CT Scanner at Home for Medical Imaging and Diagnosis

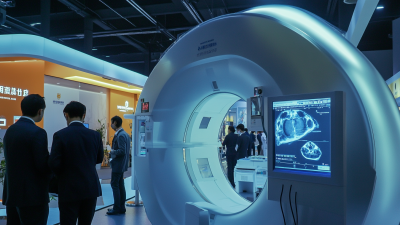
In recent years, the advancements in medical imaging technology have paved the way for innovative solutions such as the Portable CT Scanner at Home. This revolutionary tool allows for rapid and precise imaging, significantly enhancing diagnostic capabilities for patients who may face barriers accessing traditional medical facilities. According to a report by Research and Markets, the portable medical imaging market is projected to grow at a CAGR of 10% from 2022 to 2028, underscoring the increasing demand for accessible healthcare solutions.

Dr. Emily Chen, a leading expert in telemedicine and home healthcare, emphasizes the transformative potential of using a portable CT scanner in a home setting: "The integration of portable imaging technology can empower patients, providing them with immediate insights into their health without the logistical complications of hospital visits." This sentiment reflects a broader trend towards decentralizing healthcare services, catering to the needs of patients in a post-pandemic world.

As the healthcare landscape continues to evolve, the Portable CT Scanner at Home represents a significant step forward, facilitating early diagnosis and monitoring of various conditions. By bridging the gap between patients and healthcare providers, this technology not only enhances patient experience but also contributes to more effective treatment plans. As we delve deeper into the practical applications of this device, we will explore its benefits, usage guidelines, and the future of at-home medical imaging.

How to Use a Portable CT Scanner at Home for Medical Imaging and Diagnosis

Overview of Portable CT Scanners and Their Benefits for Home Use

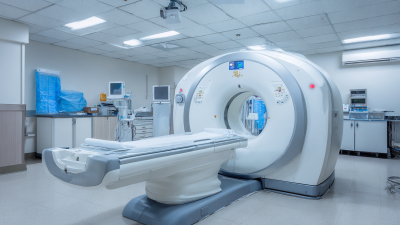
Portable CT scanners are revolutionizing the way medical imaging is conducted at home. These compact devices provide advanced imaging capabilities that were once limited to hospitals and clinics, allowing for timely and efficient health assessments within the comfort of one’s residence. With reduced size and weight, these scanners can be easily transported and set up in various locations, making them accessible for patients with mobility issues or those requiring frequent monitoring.

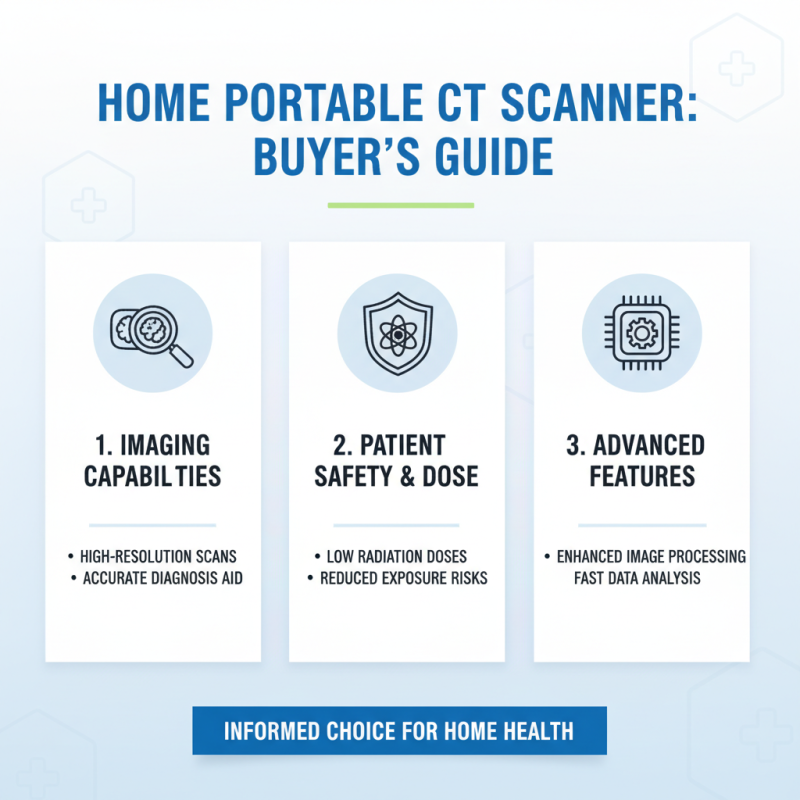
The benefits of using portable CT scanners at home extend beyond convenience. They enable quicker diagnosis and treatment decisions, reducing the time patients spend waiting for appointments and results. Additionally, they allow for continuous monitoring of chronic conditions, enhancing patient care. The ability to capture high-resolution images with minimal radiation exposure ensures that diagnostic processes are both safe and effective. By integrating these devices into home healthcare, patients can receive the necessary medical attention without the stress of hospital visits, ultimately improving overall health outcomes.

Choosing the Right Portable CT Scanner for Your Medical Needs

How to Use a Portable CT Scanner at Home for Medical Imaging and Diagnosis

When selecting a portable CT scanner for medical imaging and diagnosis at home, it's crucial to assess specific features that align with your medical needs. First, consider the scanner's imaging capabilities—look for models that provide high-resolution images that can aid in accurate diagnosis. Some scanners may offer advanced features like low radiation doses or enhanced image processing, which can significantly improve diagnostic efficacy while ensuring patient safety.

Next, evaluate the scanner's portability and ease of use. A lightweight design and user-friendly interface are essential for home settings, where multiple family members may need access to the device. Additionally, ensure that the scanner is compatible with your home environment, including electrical requirements and available space. Lastly, check for any additional features such as wireless connectivity, which can facilitate easy sharing of images with healthcare professionals for timely consultations, enhancing the overall diagnostic process right from the comfort of your home.

Step-by-Step Guide to Setting Up Your Portable CT Scanner at Home

How to Use a Portable CT Scanner at Home for Medical Imaging and Diagnosis

Setting up a portable CT scanner at home can significantly enhance your access to medical imaging and diagnosis. For optimal use, begin by choosing a suitable location that has adequate space and is shielded from everyday distractions. According to the Radiological Society of North America, proper placement is crucial, as CT scanners require special attention to minimize radiation exposure and interference from electronic devices. Ensure that the designated area is properly ventilated and adheres to the manufacturer's specifications for space dimensions, which typically recommend a room with at least 100 square feet for safe operation.

Once you have selected the location, proceed to install the scanner by following the manufacturer's guidelines. This often involves a straightforward setup process which includes connecting the power supply, initializing the software, and performing a calibration test. It's imperative to conduct these steps meticulously, as data from the American College of Radiology indicates that improper setup can lead to inaccuracies in imaging. Regular maintenance checks and updates to the software are also essential to ensure that the portable scanner operates at peak performance. Additionally, consider incorporating routine training sessions on usage and safety protocols to enhance your diagnostic capabilities and maintain a safe environment. With the right approach, a portable CT scanner can provide invaluable insights into medical conditions in the comfort of your home.

Understanding Safety Protocols and Precautions for Home Imaging

When utilizing a portable CT scanner at home for medical imaging, understanding safety protocols and precautions is crucial to mitigate potential risks. Studies indicate that improper use of imaging devices can lead to unnecessary radiation exposure. The American College of Radiology emphasizes that all imaging should follow the ALARA (As Low As Reasonably Achievable) principle. This entails optimizing the imaging process to ensure minimal exposure while still achieving satisfactory diagnostic results. Home users should ensure their scanner is calibrated correctly and only operated by someone trained in its use to minimize the risk of mishaps.

In addition to operational safety, it is vital to maintain a sterile environment when conducting imaging at home. The Centers for Disease Control and Prevention highlight that infection control is paramount, especially in a home setting where external contaminants may be present. This involves sanitizing the scanner and surrounding areas, and using protective gear such as gloves and masks. According to a report from the Radiological Society of North America, acute diligence in cleanliness and patient handling can substantially reduce the risk of infection, ensuring that the benefits of portable imaging outweigh potential health hazards. These measures ensure that patients receive safe and effective imaging services in the comfort of their own homes.

How to Use a Portable CT Scanner at Home for Medical Imaging and Diagnosis - Understanding Safety Protocols and Precautions for Home Imaging

Protocol Description Safety Measures Frequency of Use
Pre-Scan Preparation Ensure that the area is clean and free from any distractions. Wear protective gear; limit access to the scanning area. As needed before each scan.
Equipment Setup Calibrate the scanner and check battery levels. Use grounded outlets; maintain a safe distance from the device during setup. At the start of every session.
Patient Positioning Properly position the patient to avoid any movement during scanning. Use restraints if necessary; ensure comfort to reduce anxiety. Each scan session.
During the Scan Monitor the patient and equipment throughout the process. Stay outside the radiation zone; use protective barriers. Continuous during scanning.
Post-Scan Protocol Analyze and store the images securely. Sanitize the equipment; review the safety measures. After each scanning session.

Interpreting the Results: How to Analyze CT Scans for Diagnosis

Interpreting CT scan results requires a keen understanding of imaging techniques and human anatomy. According to a report from the Radiological Society of North America, CT imaging is pivotal in diagnosing conditions such as tumors, internal bleeding, and fractures. Medical professionals utilize various indicators on the scans, such as the size, shape, and density of tissues. These factors guide the diagnosis, helping to differentiate between benign and malignant lesions, for instance. Routine training and the use of standardized protocols are essential for practitioners to accurately interpret these scans, as misinterpretations can lead to incorrect diagnoses and treatment plans.

The American College of Radiology emphasizes the importance of correlating CT scan findings with the patient's clinical history and symptoms for a comprehensive diagnosis. Features like contrast enhancement patterns can provide vital insights into the vascular supply of abnormal areas, indicating potential pathologies. Furthermore, advancements in artificial intelligence are aiding radiologists in analyzing scans by highlighting anomalies that might be overlooked by the human eye. A study published in the journal "Radiology" in 2021 revealed that AI-assisted interpretations reduced errors by approximately 15%, underscoring the value of technology in enhancing diagnostic accuracy and patient care. Emphasizing the continuous education of healthcare professionals in CT image analysis is critical for optimizing outcomes in medical diagnosis.

CT Scan Results Analysis

This bar chart illustrates the average diagnostic results from a series of CT scans, categorizing the findings by type of diagnosis. The data reflects common diagnoses observed in patients undergoing portable CT scanning.